Have you ever found it struggling to choose several products simultaneously? I’m 99% sure that you once had to look for your wished items in a long list of products available and wondered why store owners did not provide a combo or a grouped products for easier shopping. Now, that dream has come true since the majority of shops have made use of this marvellous technology to simplify the shopping process. To uncover the power of this functionality, stay tune and keep reading till the end to know more about Grouped Products and how to import them to Magento 2.
What is Grouped Products?
The Grouped Product, as the name implies, is a collection of simple products that meet certain requirements. The criteria are entirely up to the store owner. Perhaps you want to give your consumers a seasonal group of products, such as sneakers, shirts, and sunglasses; or you sell camping equipment, such as tents, rucksacks, and inflatable boats. Any combination is possible.
In Magento 2, there are situations when consumers don’t comprehend the distinction between a grouped and a bundle product. But it’s actually quite simple. Customers who purchase a bundle product can select from a variety of product possibilities, and customers who purchase grouped products can add or remove product pieces as needed.
The sole benefit of grouped products is for customers’ convenience. You can offer sets of items that complement one other instead of requiring clients to navigate through different categories to fill their shopping carts. For example, a store can sell a training kit that includes a jump rope, lifting straps, weightlifting belt and a backpack to carry it in, similar to the main image for this post. Of course, they can sell each of the simple things in the grouped product separately, but offering a package of items can save time and help build a loyal customer base.
To tackle all questions related to Grouped Products, dive into the process of creating a grouped product and importing it to Magento 2 with us.
A very detailed guide to creating grouped products in Magento 2
Importing the Magento 2 grouped product is as simple as establishing a new product. Our Magento Customization Services, which simplify import and export operations, can help you improve your import and export processes even further.
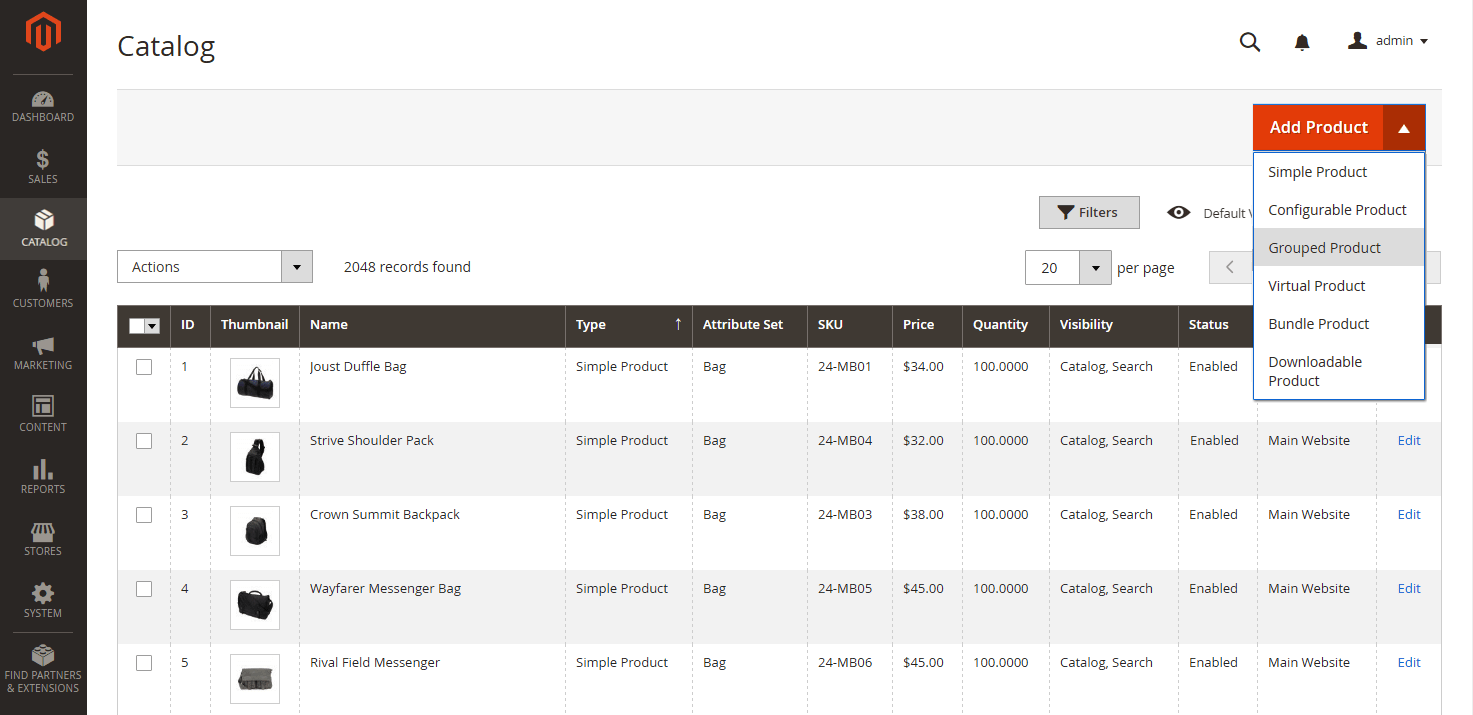
Step 1: Choose the product type
- On the Admin sidebar, go to Catalog > Products.
- Choose Grouped Product on the Add Product menu.
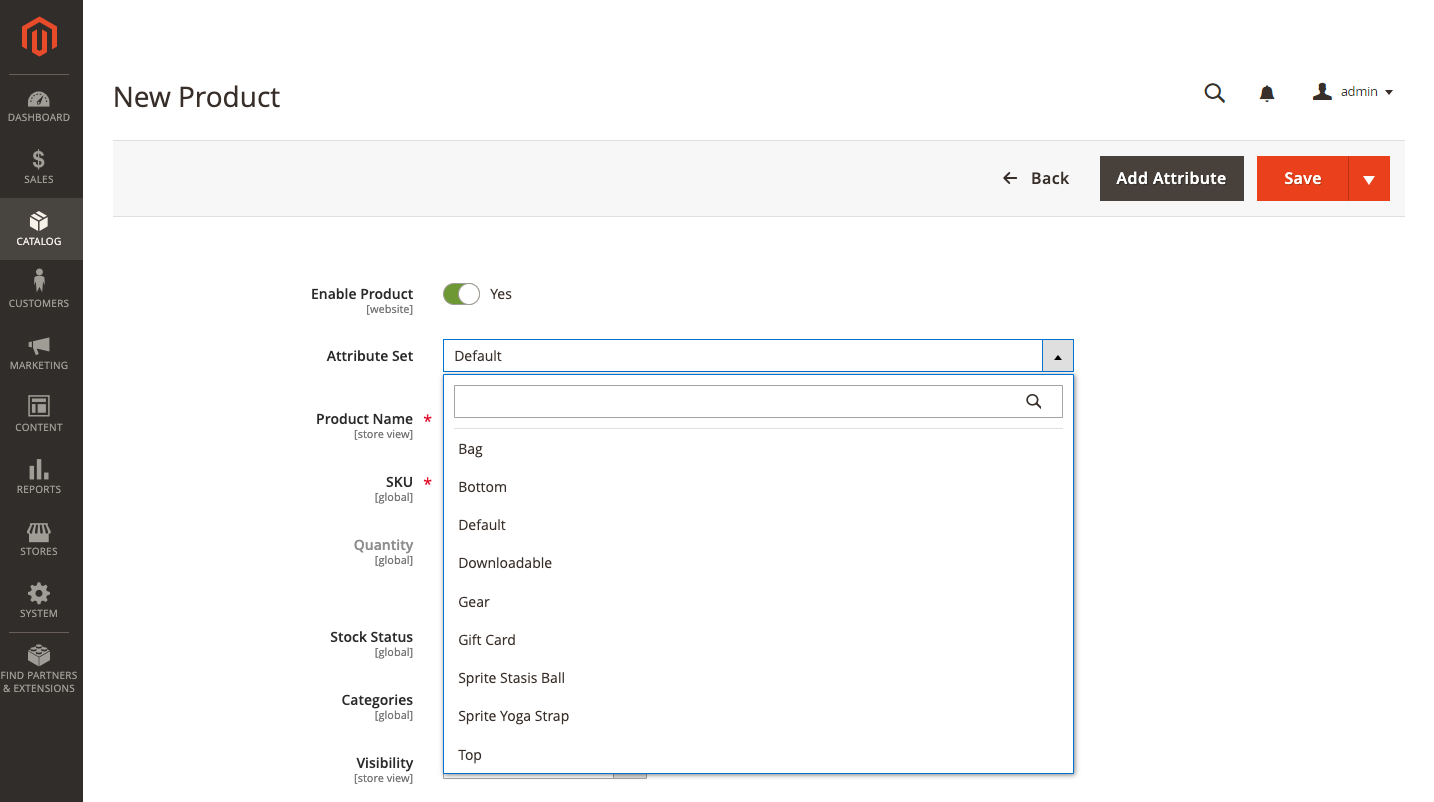
Step 2: Choose the attribute set
Choose one of the following methods to select the attribute set that will be used as a template for the product:
- Enter the name of the Attribute Set in the search box.
- Select the Attribute Set you want to utilize from the list.
To reflect the change, the form has been changed.
You can add new attributes to a product if the required attributes do not exist:
- Click Add Attribute in the upper-right corner.
- Create a brand-new attribute (see Adding an Attribute to a Product).
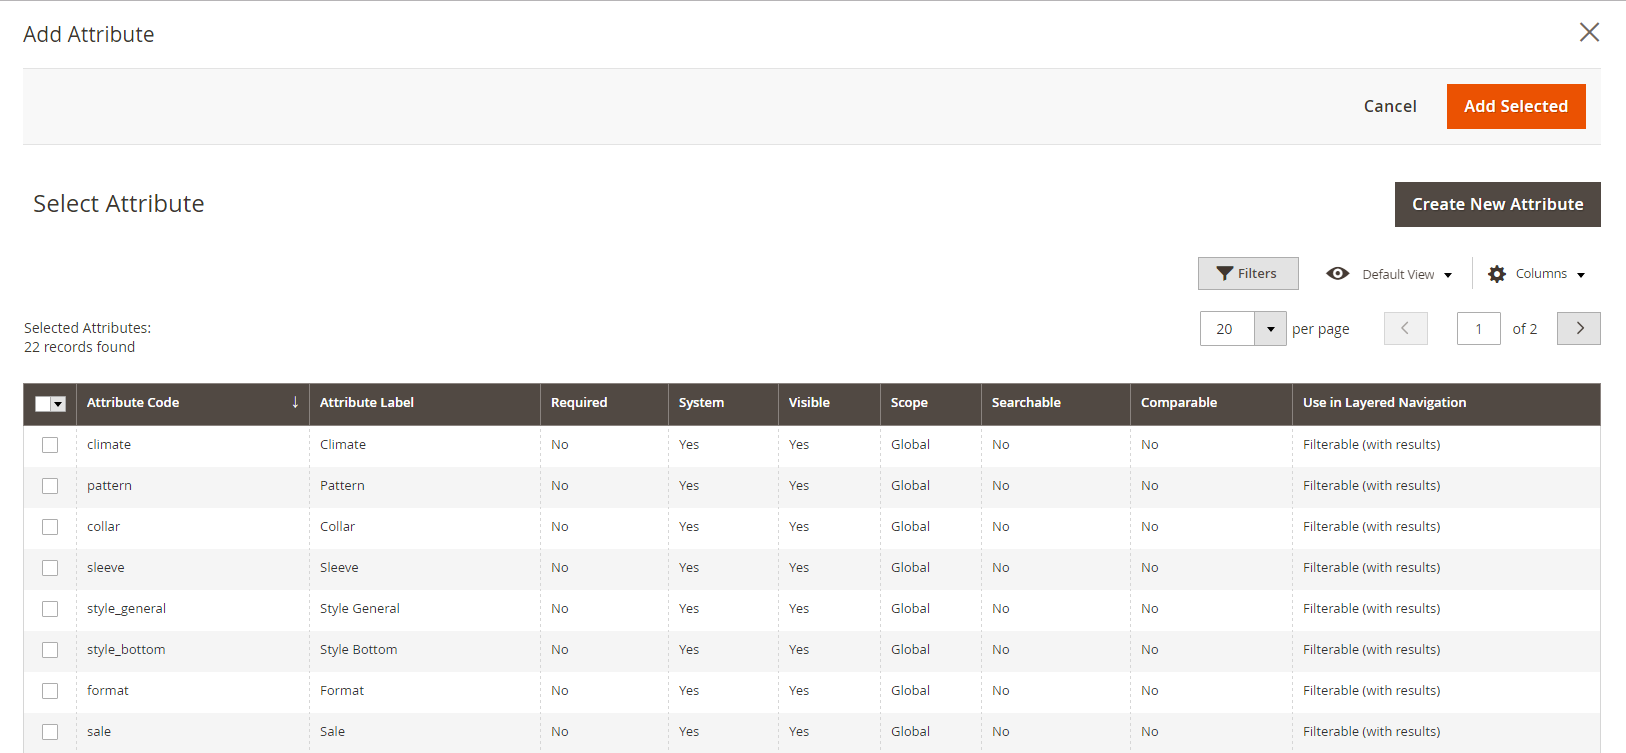
To add an existing attribute to a product, use the filter controls to locate the attribute in the grid and then follow these steps:
- Each attribute to be added should have a checkbox in the first column.
- Choose Add Selected.
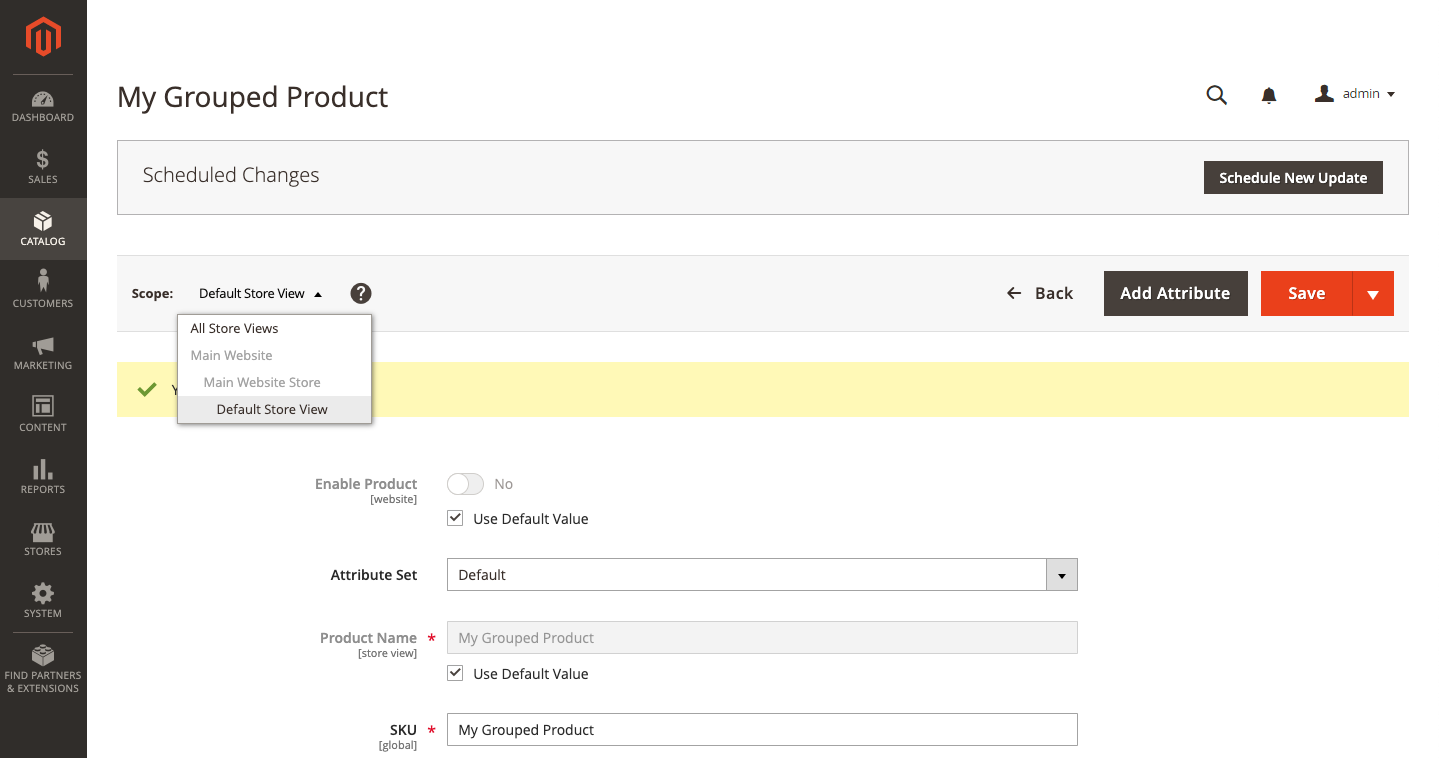
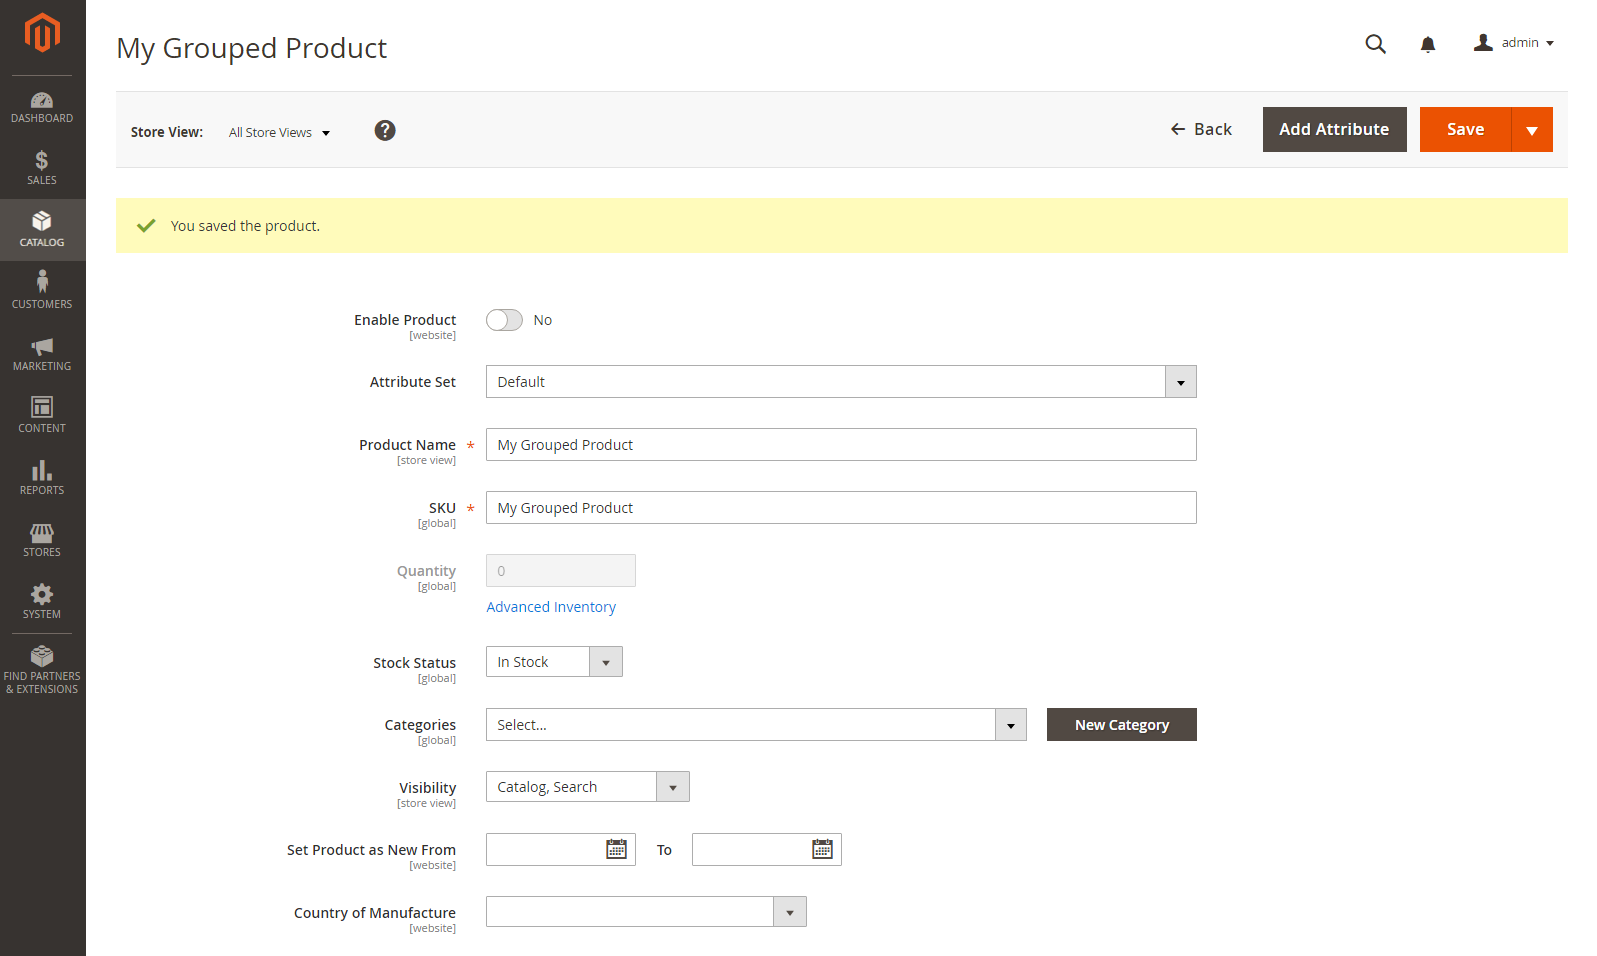
Step 3: Finish the required settings
- Add Product Name.
- Accept the default SKU based on the product name or type in a different one. Because the value is derived from the individual goods that make up the group, the Quantity field is not available.
- Set Enable Product to No since the product is not yet ready to be published > Save.
- The product name shows at the top of the page after the product is saved, and the Store View chooser appears in the upper-left corner.
- Select the Store View to check what the customer will see.
Step 4: Finish the fundamental settings
- Approve the Stock Status setting of In Stock.
- Click the Select… box and choose one of the following options to allocate Categories to the product:
Pick a category that already exists:
- To find a match, start typing in the box.
- Select the checkbox next to the category to which you want to allocate it.
Make a new category for it:
- Select New Category from the drop-down menu.
- To establish its location in the menu structure, enter the Category Name and select the Parent Category.
- Create a new category by clicking the button.
- Accept the Catalog and Search Visibility settings.
- Choose the Set Product as New From and To dates on the calendar to include the product in the list of New Products.
- Select the Country of Manufacture.
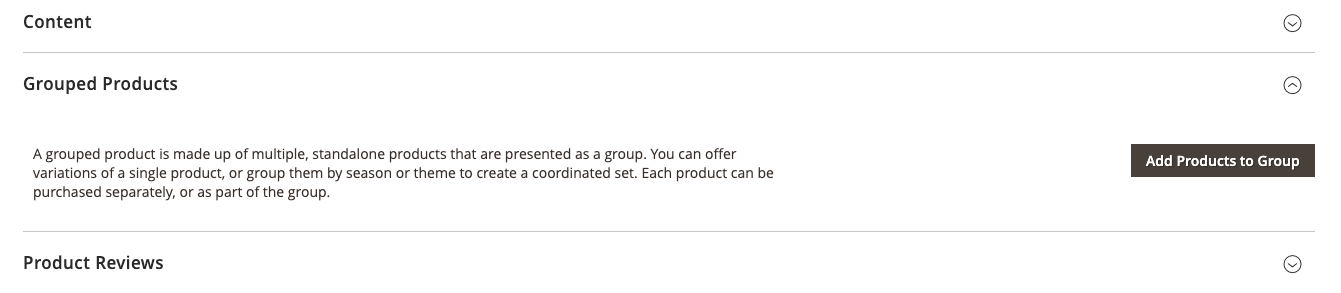
Step 5: Add Products to the Group
- Click Add Products to Group after scrolling down to the Grouped Products section > Grouped Products
2. Use the filters to find the products you wish to include in the group if necessary.
3. Select the checkbox next to each item in the list that you wish to include in the group.
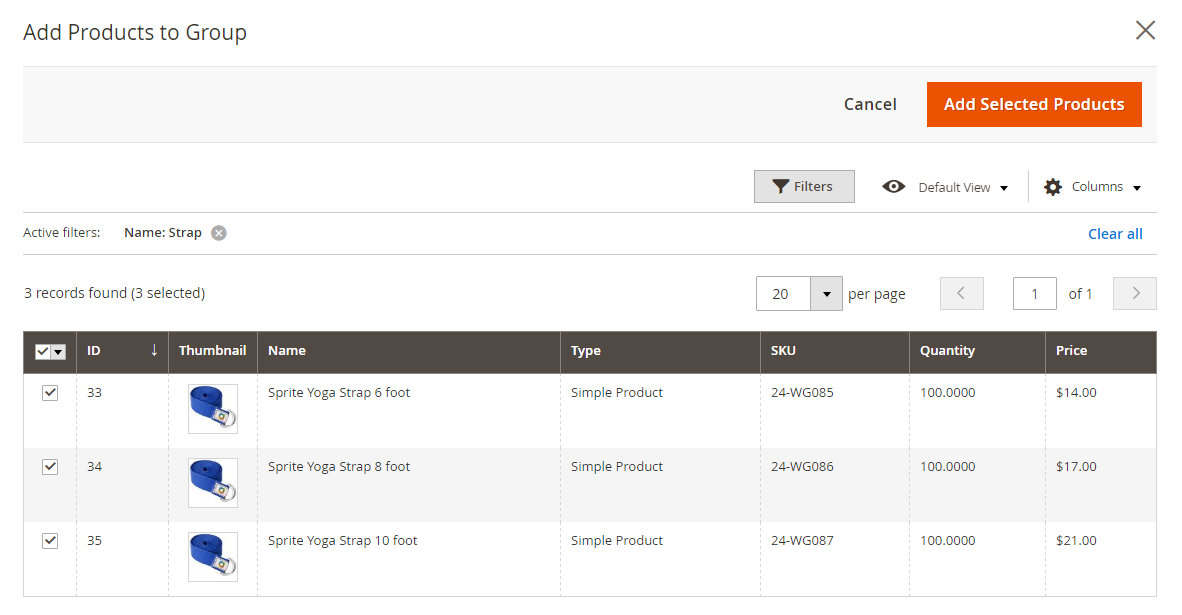
4. Click “Add Selected Products”
The selected items then turn up in the Grouped Products section.
The grid includes a Quantity per Source column with each allocated source and inventory stock amount for Multi Source merchants with Inventory Management
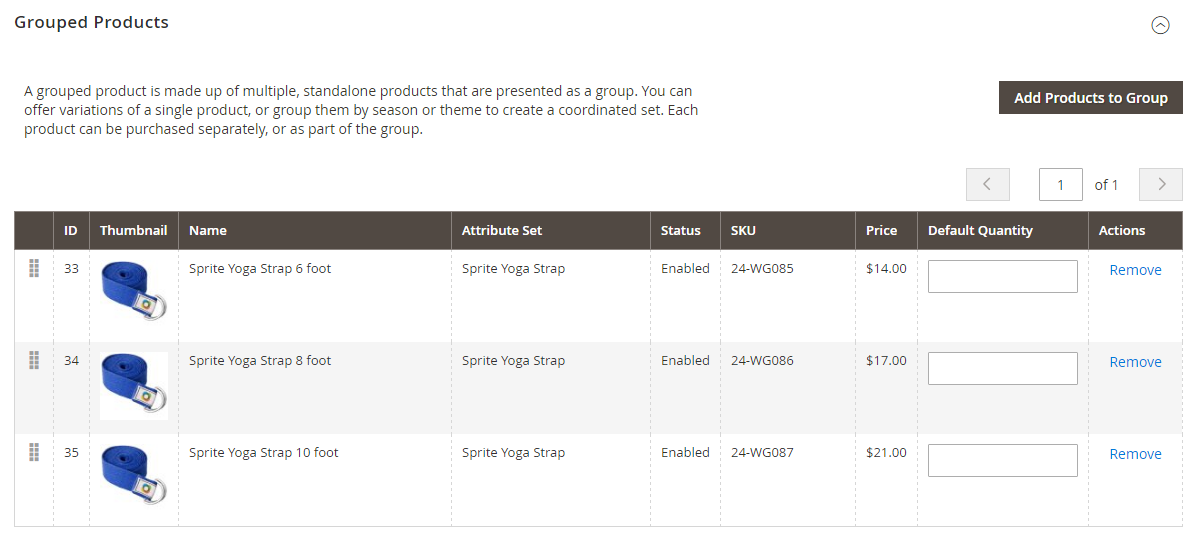
5. Add a Default Quantity to the items.
6. Grab the Modify Order icon (in the first column) and drag the product to a new location in the list to change the order.
7. Click Remove to remove a product from the group.
Step 6: Complete the product information
Complete the information in the following sections as needed:
- Content
- Images & Videos
- Search Engine Optimization
- Related Products, Up-sells, Cross-sells
- Customizable Options
- Design
- Gift Options
- Products in websites
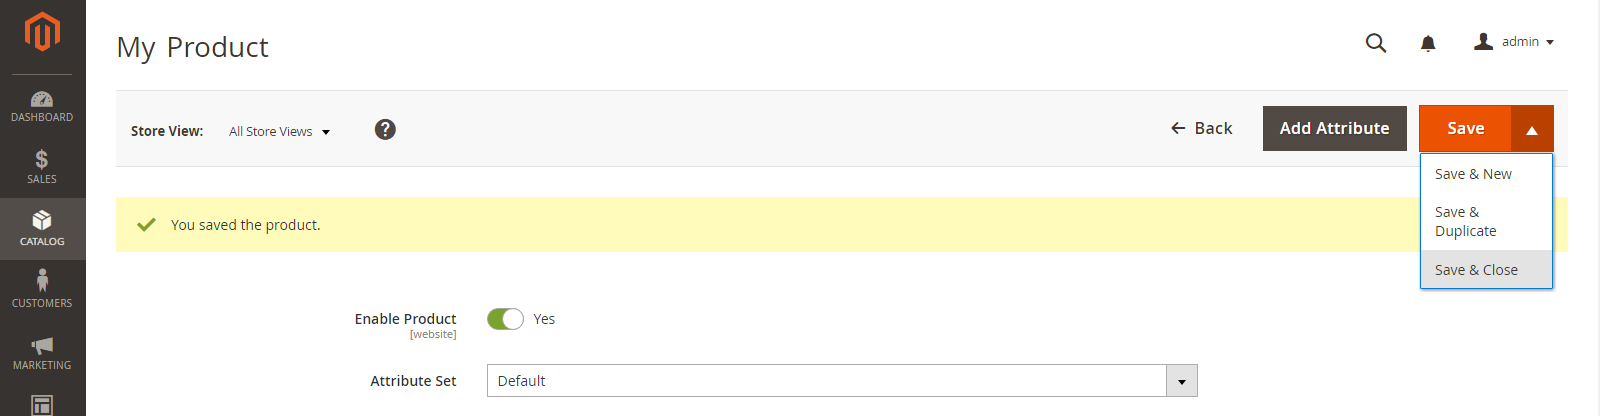
Step 7: Release the Products
- Set Enable Product to Yes if you’re ready to publish the product in the catalog.
- Choose one of the following options:
Option 1: Save and view your work
- Click Save in the upper-right corner.
- Choose Customer View from the Admin menu to see the product in your store. The store will open in a new tab on your browser.

Option 2: Save and Close
- On the Save menu, click Save & Close.
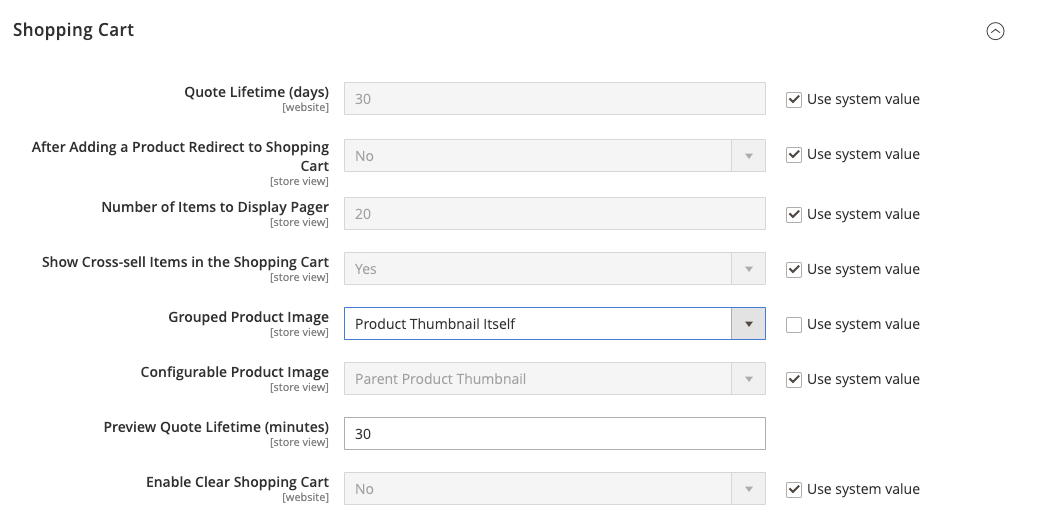
Step 8: Customize the thumbnails for the shopping cart (optional)
You can specify the configuration to use the correct image for the shopping cart thumbnail if each product in the group has a different image.
- Go to Stores > Settings > Configuration on the Admin sidebar.
- Expand Sales in the left panel and select Checkout.
- Increase the size of the shopping cart.
- Set the Product Thumbnail Itself to the Grouped Product Image.
- To set this option, deselect the Use system value checked if necessary -> Save Config.
How to Import Grouped Products to Magento 2?
1. Import Grouped Products to Magento 2 automatically
The Improved Import & Export extension, which uses a daily calendar to automate data transfers between Magento 2 and third-parties or other Magento 2 websites, can be used if you need to move products between Magento 2 and third-parties or other Magento 2 websites on a regular basis. As a result, you’ll be able to automatically import and export grouped products between Magento 2 and external destinations, as well as create an update schedule. The module then takes care of the rest.
2. Import Grouped Products with third-party attributes to Magento 2
While Magento 2 prevents third-party data from being imported if it does not meet its internal standards, the Improved Import & Export extension makes this possible. It allows you to construct a mapping scheme that maps third-party properties and their values to system attributes. As a result, any external data can be simply modified to your e-commerce website’s local requirements. You can also use mapping to generate the output your partners demand in export operations.
3. Import and export to Magento 2 via API
You can use the Improved Import & Export Magento 2 extension to construct API connections to transfer not only grouped products, but any other entity, allowing you to freely move data between Magento 2 and external systems. The import/export operations in the module have a part where you can define the parameters needed to sync the two systems. It’s worth remembering that you can establish a bi-directional API connection. When it comes to unsupported attributes, the plugin’s mapping functionality can be used to transfer them via API connections.
4. Import and export to Magento 2 Via ODS files
Import and export improvements allow you to move grouped products using ODS files. To comply with Magento 2’s criteria, you no longer need to convert them to CSV. This file format can also be used to export data.
5. Import and export to Magento 2 Via XLSX files
Improved Import & Export helps you to migrate grouped products using XLSX files. To comply with Magento 2’s criteria, you now don’t need to convert them to CSV. This file format can also be used to export data.
6. Import and export to Magento 2 via JSON files
If your data is kept in a JSON file, there’s no need to convert it to a CSV file to comply with Magento 2’s standards. With the Improved Import & Export Magento 2 extension, you may import JSON files into your eCommerce store without having to convert them first. This file format can also be used to export data.
7. Import and export to Magento 2 Via compressed files
If your files with grouped products are compressed, you can use the Improved Import & Export extension to transfer them to Magento 2. It’s important to keep in mind that your file archive should be in ZIP or TAR format. Compressed CSV, XML, ODS, JSON, and XLSX files are all supported by our module.
8. Import and export to Magento 2 from Google Sheets
It is not a problem if grouped products are stored in Google Sheets. It’s not necessary to export them from the service, convert them to CSV, and then import the results into Magento 2. You can now import and export data directly from Google Sheets to your e-commerce website using the Improved Import & Export feature. Only the address of the related data table needs to be specified.
9. Import and export to Magento 2 from Dropbox
Additionally, the Improved Import & Export module, allows you to import grouped products from Dropbox into Magento 2. They can be saved in CSV, JSON, XML, ODS, or XLSX files, as well as ZIP and TAR archives. This file storage can also be used as an export destination.
10. Import and export to Magento 2 from Google Drive
The Improved Import & Export module, beside Google Sheets and Dropbox, allows you to import grouped products from Google Drive into Magento 2. They can be saved in CSV, JSON, XML, ODS, or XLSX files, as well as ZIP and TAR archives. This file storage can also be used as an export destination.
Finally…
To sum up, we have discovered complete steps to create a Grouped Product and import it to Magento 2. There are several ways, if you prefer hiring professional developers, come to us. Magesolution provides the optimal Magento Customization Services for businesses from all over the world. If you are looking for a company that is able to offer you a powerful tool for your stores, don’t hesitate to CONTACT US right now and receive a free quotation!


