Magento google tag manager is an essential tool that can help you better understand your website’s performance and discover new ways to improve your website. With this tool, you can gain more control over how you track website activity and assure that your tracking data is accurate. In this post today, we will introduce to you everything about Magento google tag manager and how to do it on Magento 2 website.
What is Google tag manager?

Google Tag Manager is a user-friendly, powerful, and must-have tool in every Magento store. It simplifies the process of adding, editing, and managing third-party JavaScript tags and other snippets of code on your Magento 2 site. Moreover, It allows you to quickly and easily add Facebook tags, AdWords Conversion Tracking, Re-marketing, Bing UET, SnapChat, DoubleClick code, Google Analytics, and many more with ease. In addition, the tool can work with both Google tags and non-Google tags, so right after you intergraded the GTM to your website, you can set up Google analytics and other supportive tools to track and report the website traffic.
You don’t confuse Google Tag Manager (GTM) with the latest version of Google Analytics, as it helps to set up the GA and any other code. GTM relatively contains 3 main parts:
- Tag: Tag is a patch of code (more often it’s JavaScript) added to a page.
- Triggers: Trigger identifies when and where the tags are to be executed.
- Variables: Variables receive and keep the information used by tags and triggers.
The Difference Between Google Tag Manager and Google Analytics
Basically, Google Tag Manager and Google Analytics help to track and create crucial analytics to measure and enhance your eCommerce website. However, Google Tag Manager’s focus is on tracking data. On the other hand, the purpose of Google Analytics is to support you to review and analyze your data. In addition, unlike Google Analytics, Google Tag Manager doesn’t equip you with any reports. You can’t use it to analyze data.
If you’re currently using Google Analytics, applying GTM won’t change your reporting or data analysis routine. You’ll still be setting up custom segments, running conversion reports, and analyzing your sales from within Google Analytics.
More immortally, if you’d like to use these two tools together, you’ll need to ensure to remove the Google Analytics code from your website first. Having both the Google Analytics and GTM tracking codes on your Magento website will result in double reporting and inaccurate data.
Overall, you can gain better performance when integrating two of these tools together. If you don’t know how to do it, our topic Magento 2 google analytics integration: The comprehensive guide to implementing it will help you install it.
Why do you need Magento to Google tag manager?

There are plenty of advantages that come with using Google Tag Manager. It supports you to:
- Have more control: GTM allows you to customize the data that’s sent to Google Analytics. You can use GTM to monitor basic events, but also to implement complex improved eCommerce tracking.
- Save a lot of time: You and your development team can focus on more crucial tasks instead of spending time manually adding tags to your Magento site. Tags can be applied a lot faster by adding them to GTM compared to implementing them manually.
- Organize better: Tracking tag data through the GTM interface enables you to organize all your tags in a single location.
- Reduce tracking errors: Errors can happen when you try to add tags manually. You might insert the tag in the wrong place, or combine a typo that messes up the entire feature of the tag. With GTM, you will prevent this from happening.
- Implement tags correctly: Google Tag Manager doesn’t support you to publish tags that include syntax errors. Adding tags through GTM make sure that they’ll work as intended. Besides, GTM also enables you to debug your tags in its preview mode.
- Enhance the website performance: With the help of GTM’s usage of data layers and asynchronous tag deployment, your Magento site will perform better because there’ll be fewer delays related to firing tracking tags.
Let’s understand the process of adding Magento google tag manager in your eCommerce store.
How to Set Up Google Tag Manager for Magento 2?
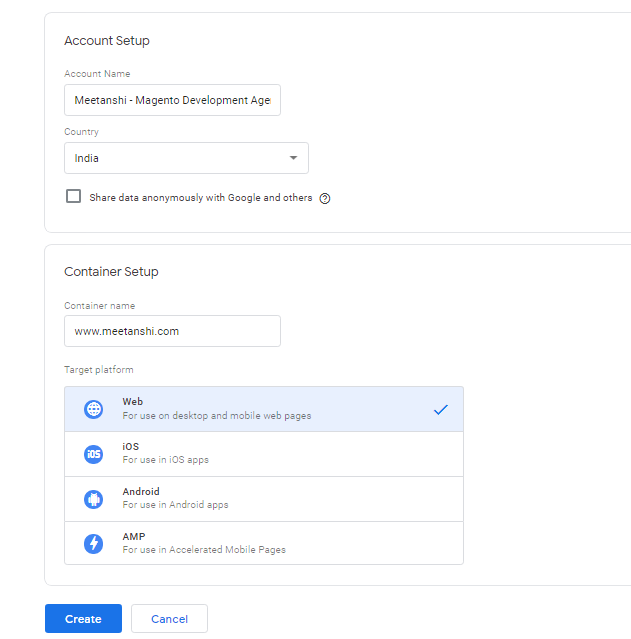
- Firstly, you need to Create a Google Tag Manager Account. You need to get started with Google Tag Manager. Click on “Start for free”.

- After login in with your Gmail account, you will need to generate a Google Tag Manager Account. Write down your account name, and country, and choose the target platform. Then, click on create.
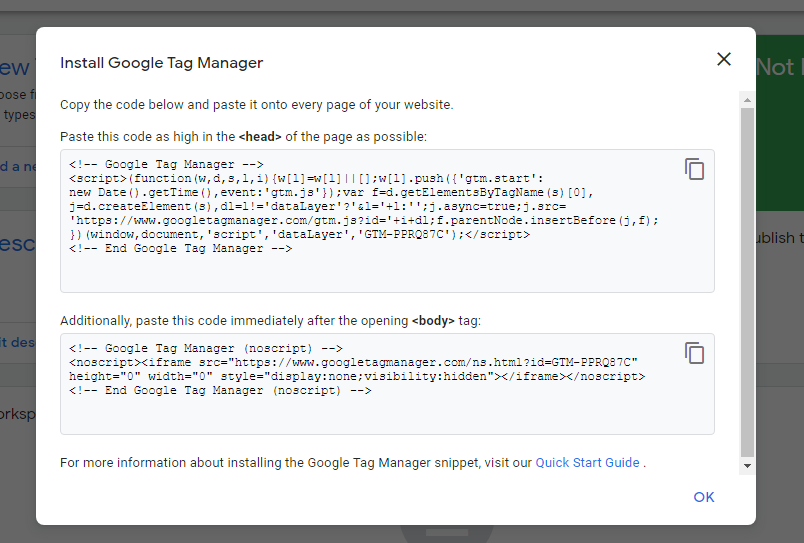
- To get the GTM Code: There are two sections in the code. In the first one, you need to paste in the header section and in the second one, you need to paste in the body section of your Magento 2 site.

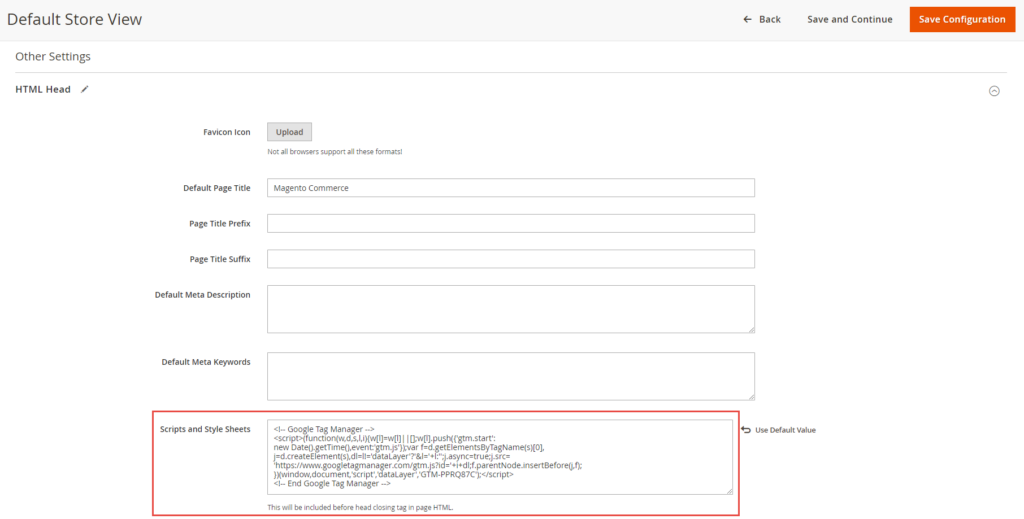
- Next step, you open your Magento Admin Panel and go to Content > Design > Configuration > Edit the Store View > Other Settings> HTML Head. Paste the code you got from GTM for the <head> tag here.
- Now navigate to Footer and paste the GTM code for <body> under the “Miscellaneous HTML”. and Click Save Configuration.
- Move to frontend to check if GTM is installed in Magento 2 site. You open the home page and click CTRL + U to open the view source. Find GTM and you can see the code.
- And there you have it!
You can easily add Google tag manager in Magento 2 without any cost if you do it by yourself. However, if you need an easier and more effective solution to turn data-driven business decisions in life. You can check out our Magento Website Development Service.
Final words
We complete the Magento google tag manager today. If you are still getting the error or have any questions, then contact our support team to get an instant solution. We’re very pleased to support you.


