Magento credit memo function allows store owners to quickly partial refund the customers’ money. When a customer requests a full or partial refund, you need to generate a credit memo. This is a document that illustrates how much money they will get. In this tutorial, we will show you step by step method to create and print a credit memo in Magento 2.
What is Magento credit memo?
A credit memo is a commercial document that is issued by sellers to customers. In commerce, the credit memo is sent to shoppers when they request a refund for any product in case he/she is not satisfied with the product or if there are any pricing error any other reason. Or, in case shoppers pay excess on product compared to invoice, the shop owner can use the credit memo to return this excess.
Usually, the credit memo includes information like product name, product price, quantity, purchase date, payment method, delivery address, and other details. Also, all this information helps the store owner to keep a record. In Magento 2, the Credit Memo is a document that specify how much money will be returned to the shopper. However, the way you create credit memos in Magento 2 generally based on the payment method used while placing the order. There are 2 types of credit memos: Online and Offline.
- Offline Credit Memo: that means the refund will be saved just in the Magento database and the funds won’t be transferred to the bank. Hence, no money will be actually returned. It is applied in case the offline payment method (e.g. money and check) was used while placing an order.
- Online Credit Memo: In this case, it is filed if your payment method module supports the IP bank communication. Also, the payment method module contacts the bank, and a certain amount of money is charged from the seller’s account. Remember that not every payment method allow you to make an online credit memo.
How to create a credit memo in Magento 2?
There are 2 methods of how you can create a credit memo in Magento 2 depending on the payment method. Let’s consider them closely.
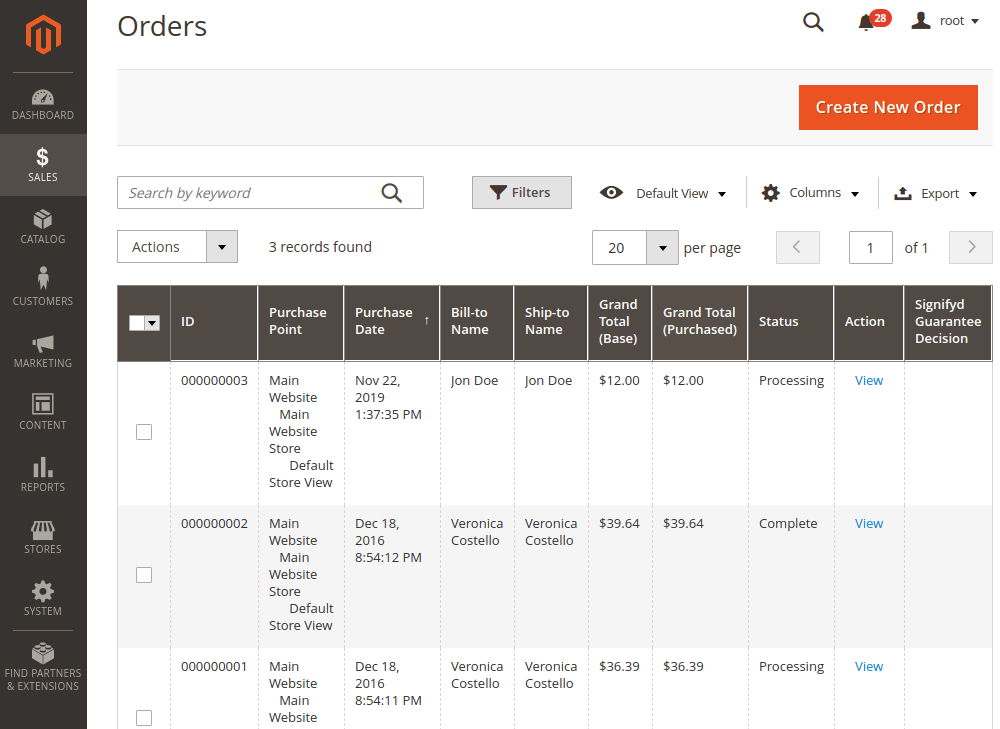
1. You login the Admin Account, move to Sales > Orders.
2. Select the product for which you want to generate a credit memo and simply click on it or click the View button.

3. From the order details page, click on Credit Memo.
The Credit Memo will be available only if the invoice is generated for that order.
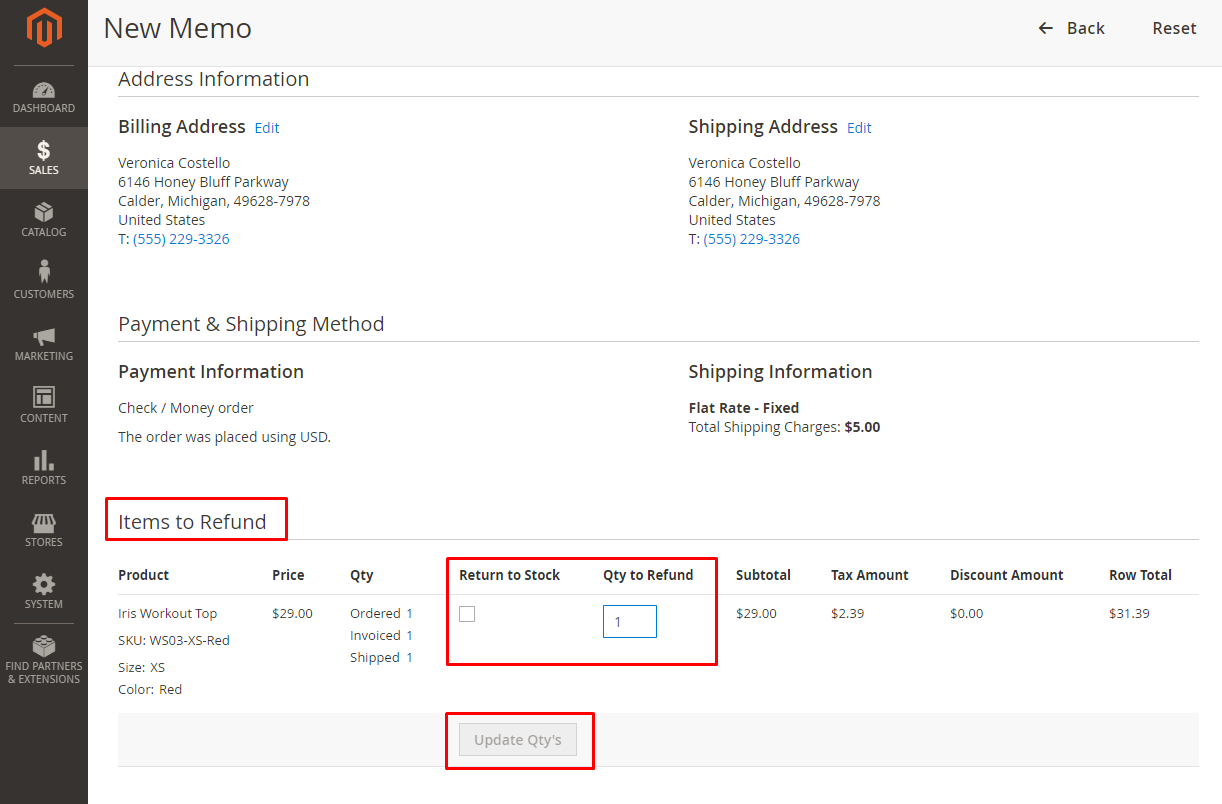
4. From the New Memo Page, move to Items to Refund section.
- Clicking on the Return to Stock checkbox means the product will be restored to inventory. Keep it blank if you do not want the product to be restored to inventory.
- Enter the quantity of product that is to be returned into the Qty to Refund box. If there are no items to be returned, set it to 0 (zero).
- At last, click the Update Qty’s button to save the changes.
Notes:
- When the inventory Stock Options is set to Decrease Stock When Order Is Placed then only the Return to Stock checkbox will be available.
- The amount to be credited must be less than the maximum amount possible for a refund.
5. Next step, you go to the Refund Totals section.
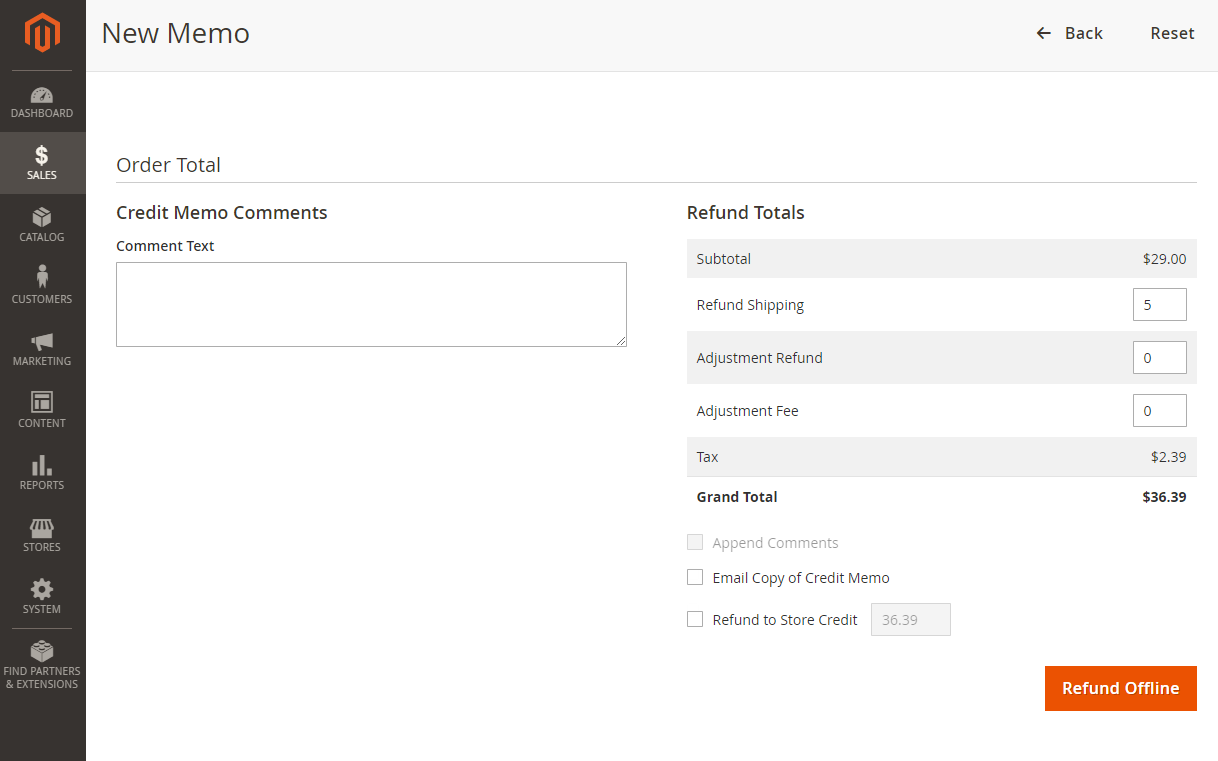
- Refund Shipping : Enter the amount by subtracting the original shipping amount with the shipping fee already refunded.
- Adjustment Refund: Enter the extra refund amount apart from product price, shipping fee, and tax price.
- Adjustment Fee: enter the value that will be subtracted from the total value refunded.
- Email Copy of Credit Memo : Tickmark the box to send a credit memo to the customers via mail.
- Credit Memo Comments: In this box, you can write comments for the credit memo.
- Append Comments : Tickmark this box if you want to attach the comments along with the mail.
6. Lastly, click on Refund Offline and your Credit Memo is generated!
For payments with check or money
- You move to Sales > Orders, find the needed order on the grid, and click View.
- After that, you click Invoice at the top of the page, scroll down, and click Submit Invoice.
- Then, click Credit Memo at the top of the page.
- In the Items to Refund section, set how many products should be refunded.
- Choose the Return to Stock checkbox if the product will be returned to the shop and will be available for sale.
- When ready, click Update Qty’s.
- Move to the Refund Totals section, and specify the amount of shipping fee would be returned in the Refund Shipping field.
- In the Adjustment Refund field, enter any additional fees that would be returned.
- In the Adjustment Fee field, define the amount that should be subtracted from the refund total.
- If needed, you can add a comment to the Credit Memo Comments box.
- When complete, click Refund Offline, and a credit memo will be created in the Magento 2 admin panel.
How to print credit memo in Magento 2?
If you want to Print Credit Memo in Magento 2, you can follow the below steps:
- Go to Admin > Sales > Credit Memos.
- Under Operation, click Credit Memos.
Here there are 2 options you may select after this step:
- Print a Single Credit Memo: click on Print button on the left top corner to print the current credit memo.or
- Print Multiple Credit Memos: Mark the checkbox next to the credit memos that you want to print. Now, choose PDF credit memos in Action box and then click to Submit.
Lastly, you Save the documents in your computer, open them in the Adobe Reader, and print the documents.
How to add a comment to the completed credit memo?
1. In the View Memo page, you need to scroll down to the Comment History section and type the comment in the box. Below the Comment History section is the history of all activities related to the order.
- Mark the Notify Customer by Email check box to send the comment to the shoppers by email.
- Mark the Visible on Frontend checkbox to post the comment in the shoppers’s account.
2. Click To The Submit Comment button.
Remember that if you want to check any credit memos related the order, please click to Credit Memos in the left panel.
Conclusion
Above is the step-by-step guide of how to create a Magento credit memo that we want to provide for you. Save it for yourself. Magesolution hope that you can implement it effectively. In case you have any trouble when applying these steps to create or print your Magento credit memo, then contact our Magento development services to get an instant solution. We’re very pleased to support you.
Contact us for a free consultation!![]()
Read more


