Customers want to be able to rapidly access their stored goods, prior orders, etc. when they are shopping in your business. With a customer account, you can simply give your consumer a customized experience.
Let’s discuss why you need a customer account and what elements you must enable to create a functional customer account.
How important are Customer Accounts?

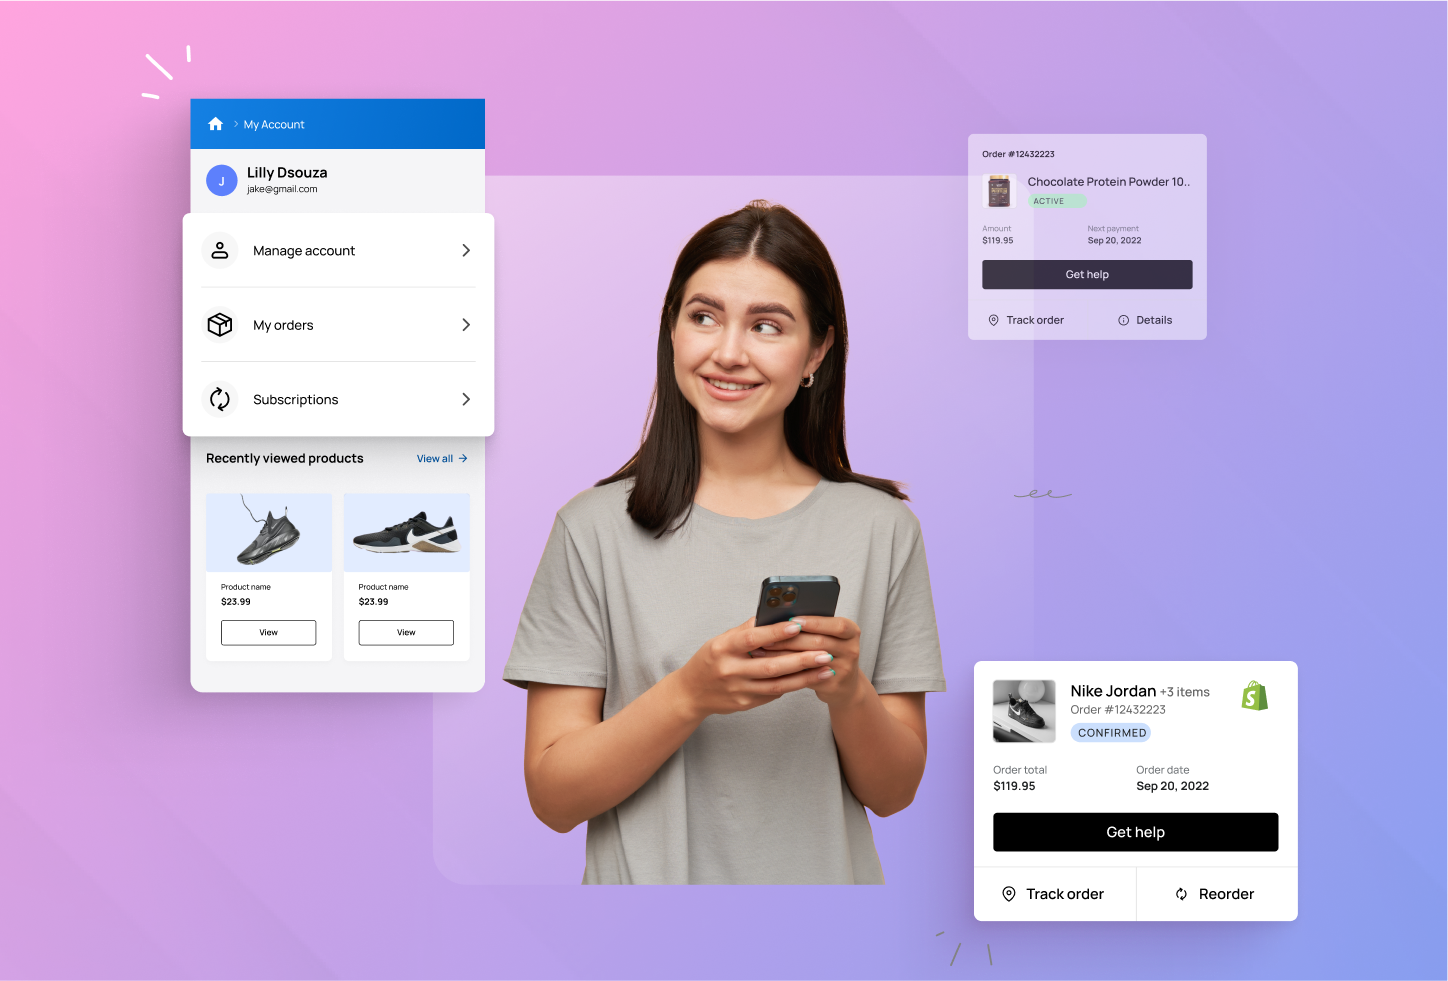
Your client may manage their orders, invoicing and payment information, and saved goods all in one location by creating a customer account. Customers may view additional information about the rewards they’ve earned on their customer account if you have a loyalty program.
You may make it simpler for customers to glance at their orders, wish lists, and incentives by creating a customer account. Customers would be happier with your Shopify store if they had such a simple experience.
Eighty percent of customers are more likely to buy a good or service from a company that offers individualized experiences. Such a tailored experience is offered to your consumers through a customer account. With the help of the central hub, your customers may retrieve their history with you more easily and act more quickly.
You’ll find it simpler to sell to your clients by sending them tailored messages based on their interests and preferences if you provide them with a highly customized purchasing experience. You may effectively retain consumers by using communications that are specifically designed to encourage them to make more purchases.
Features of a comprehensive Customer Account
Here are 6 features you can add to a customized customer account to enhance the user experience for your consumers.
1. Reorder feature
By including a “Reorder” option on their previous orders, you may streamline your customers’ contact with your business. Instead of clicking on the item and then adding it to their basket, customers can just click “Reorder,” and the item will be put in their cart and available for checkout.
2. Easily get access to previous orders
Providing information about the customer’s order history, order total, products purchased, etc., make it possible for consumers to view their previous orders. Customers will be able to locate certain products, submit support requests for particular orders, and even track returned goods here.
3. Loyalty program
Enable customers to collect rewards and view them in their Shopify store accounts. You can increase repeat purchases and draw clients back to your store by converting casual customers into devoted ones with a loyalty program.
4. Wishlists
A customer’s wishlist is a collection of goods they intend to buy in the future. Create a wishlist page in the customer area of your shop so that consumers can browse all the items they have saved there and even add them to their cart if they want to make a purchase.
5. Social login
Customers are more likely to abandon carts and refrain from placing orders when the login procedure is lengthy. Your clients may log in using their social network accounts with only one click thanks to social login.
This enables you to make the login process for customer accounts simpler, making it simpler for consumers to register after making a purchase. Social login enables you to attract new subscribers and register store visitors who otherwise would not have done so.
6. Recently viewed products
Your customer account’s “Recently Viewed Products” area is the ideal place to remind customers of the items they were previously seeing. Use the “Recently Viewed Products” option to make it simpler for clients to shop fast rather than asking them to search for items they have already seen. You can immediately boost your conversions with this functionality.
How to set up a personalized Customer Account on Shopify

Shopify maintains password-protected data about a customer’s identity, purchase history, and current order status when you enable customer accounts. During checkout, saved information is automatically used to fill in your client’s details, such as their addresses. Customer accounts must be used in conjunction with the online store sales channel.
1. Set your customer account preferences
Customer accounts might be obligatory, voluntary, or completely disabled. Customers are led to a different account creation page when they create an account. Remember that forcing users to sign up for accounts may result in lower sales conversions.
Desktop
- Go to Settings > Checkout in your Shopify admin.
- Select a customer account option in the “Customer accounts” section:
- Accounts are disabled: During checkout, customers won’t have the opportunity to register for an account or log in. Their information won’t be filled in automatically at checkout, so they will need to enter it manually.
- Accounts are not required: Although it is optional for customers to register for an account, it is recommended. Customers’ address information is filled up automatically when they place an order if they have an account and are signed in. Customers can choose to log in by clicking the Already have an account? Above the email entry area is a login link. When a consumer clicks this link, they are given the option to proceed with their checkout as a guest, register a new account, or input their email address and password.
- Accounts are needed: To finish the checkout, customers must log in or establish an account if they don’t already have one. This setting is advantageous, for instance, if you run a wholesale or members-only shop. When a consumer puts an order, addresses are automatically filled in. The option for your consumers to create accounts is still available even if you want to require accounts. You must modify your store’s theme if you want to restrict access to it.
- To confirm your customer account settings, click Save.
Customers can use one of the addresses they previously used if they are logged in at the time of purchase. They can also type in their address. Customers are not given the option to select the five addresses they want to store.
The option to save this information for next time is also available on your checkout form. During checkout, if a client chooses to save their contact and shipping information for later, your store’s information is saved in the consumer’s browser. The customer’s contact and shipping address information is automatically filled up by their browser the next time they use your checkout. The information that a client saves is not stored by Shopify. The customer’s browser stores the data in a cache. If the client hasn’t already emptied their cache, Shopify instructs the browser to delete the customer’s cached data after a year.
iPhone & Android
- Go to Store > Settings in the Shopify app.
- Tap Checkout from the Store settings menu.
- Select a customer account option in the “Customer accounts” section:
- Accounts are disabled: During checkout, customers won’t have the opportunity to register for an account or log in. Their information won’t be filled in automatically at checkout, so they will need to enter it manually.
- Accounts are not required: Although it is optional for customers to register for an account, it is recommended. Customers’ address information is filled up automatically when they place an order if they have an account and are signed in. Customers can choose to log in by clicking the Already have an account? Above the email entry area is a login link. When a consumer clicks this link, they are given the option to proceed with their checkout as a guest, register a new account, or input their email address and password.
- Accounts are needed: To finish the checkout, customers must log in or establish an account if they don’t already have one. This setting is advantageous, for instance, if you run a wholesale or members-only shop. When a consumer puts an order, addresses are automatically filled in. The option for your consumers to create accounts is still available even if you want to require accounts. You must modify your store’s theme if you want to restrict access to it.
- To confirm your customer account settings, click Save.
Customers can use one of the addresses they previously used if they are logged in at the time of purchase. They can also type in their address. Customers are not given the option to select the five addresses they want to store.
The option to save this information for next time is also available on your checkout form. During checkout, if a client chooses to save their contact and shipping information for later, your store’s information is saved in the consumer’s browser. The customer’s contact and shipping address information is automatically filled up by their browser the next time they use your checkout. The information that a client saves is not stored by Shopify. The customer’s browser stores the data in a cache. If the client hasn’t already emptied their cache, Shopify instructs the browser to delete the customer’s cached data after a year.
2. Invite customers to create accounts
You may send customers direct invites to urge them to activate an account if you set customer accounts to optional or compulsory in your Checkout settings. They will get an email asking them to set up their password. The invitation sent through email is only good for 30 days.
If the consumer has an account with your shop, you may check it on their profile page. For certain customers or all of your customers, you may create a customer account invite email.
Before jump to it
There is a preset subject line and body message when you construct the email message that is delivered to the customers. Go to Settings > Notifications > Customers > Customer account invite to alter the text in the Subject and Custom message fields.
3. Send individual account invites

Customers must already be added to your business before you can invite them to register. The consumer isn’t included on the customer list if they haven’t been added to your store. In this instance, you must first add the customer.
Only the desktop version of your Shopify admin may send invitations for customer accounts. The Shopify app doesn’t have this option.
Steps:
- Go to Customers in your Shopify admin.
- Select the customer whose name you wish to invite.
- Click Send account invite.
- Edit the Subject field’s content (optional).
- Enter a message for your clients in the Custom message area. The default message is provided to the consumer if this field is left empty.
- Then click Send notification after selecting Review.
4. Send customer account invites in bulk
Sending account invites to all of your clients who haven’t signed up yet via an app is an option.
5. How to examine your customers’ active subscriptions
Information about a client’s subscription is shown on their customer profile after they purchase a subscription product. In the Active subscriptions area, you can see the items that a client has subscribed to as well as the date of their subsequent order.
Steps:
- Go to Customers in your Shopify administration.
- Click on the client’s name.
- One of the following actions should be taken under the Active Product Subscriptions section:
- Click View order to access the customer’s subscription order.
- Click View subscription to get the subscription details in your subscription app.
Steps to disable a customer’s account
If you require client accounts, you can disable an account to stop a certain customer from ordering from you.
- Go to Customers in your Shopify administration.
- Click on the client’s name.
- Click Disable Account.
Final thoughts
We hope the information above will be useful to you in running your eCommerce business. If you are interested in other Shopify posts, visit our blogs. Not only offering informative eCommerce posts, Magesolution also brings about the excellent Shopify customization services to help you modify your eCommerce website. Now, let’s start exploring!


